Strike A Pose!


I was chatting with a friend last night about an idea she had for a picture in Second Life.  We determined the hardest parts of these "ideas" is finding the right location, and the right pose.  I posted a question to my friends about their favorite pose shops, and below is the initial list we came up with, with SLURLS!


ImpEle

Glitterati

Long Awkward Pose (LAP)

ANA_mations

LostAngel

ME-YA

Reel Expression

Striking Poses

Diesel Works

Slash Me poses

CnS

Penny Dreadful Arcade (PDA)

Strike a Pose

Essential Soul

Virtual Elements

I will have a notecard inworld available with the above links for anybody that wants it.

Also, if you know of a great pose store that is not on this list, just let me know and I will add it!

Happy Posing!
Read More

Monday, January 4, 2010

Tutorial links!


I wanted to share with all of you some fantastic tutorials for photo editing.    These tutorials are courtesy of Riker Beck.  Her blog can be found at http://www.rykerbeck.com/.
Ryker is really an amazing talent, for so many things.  I hope you thank her personally for all the information she has shared with us over the years.
Here are her links.  They can also be found on her site!

Have Fun!
Read more

Flying Trapeze


Title of picture - Flying Trapeze

Photographer's Name - Cajsa Lilliehook

Models Name - Cajsa Lilliehook

Location used - My Photosphere

Windlight settings used - Default

Second Life Graphics Settings - Medium, 2:50am

Inworld photo tools used - Photosphere

Details of inworld tools - See notes below

outworld tools used - Photoshop

Processes used in outworld tools -  I shot this photo in my photosphere using the Default setting at 2:50 AM and shifting the angle of the sun/moon.  I have my sphere on the ocean bottom and find the water softens the skin - similar to the blizzard filter but without losing shadows as you do in blizzard. 

In PhotoShop I adjusted for levels, simply dragging the right point to the beginning of content.  I then used render Lighting Effect - the spotlight to make the spotlight effect - again dragging it around to get what I wanted. I increased the exposure of the photo outside the spotlight so that it was not completely dark.

Then I saved the pic as you see in the png.

I then opened the overlay texture from Distressed Textures - (Treasure Textures package), resized it to the size of the picture, copied and pasted on the png, reduced opacity to 31% and saved.

That's it

Comments & Additional info
Read more

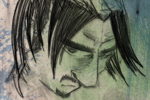
The Sketch


Title of picture - The sketch

Photographer's Name - Rylan Carling

Models Name - Cole Kaestner (sneak attack)

Location used - Some random store

Poses Used - None, outside of models AO

Windlight settings used - Basic default, played with lighting to get best shadow reduction

Second Life Graphics Settings - Medium

Inworld photo tools used - None

Details of inworld tools - NA

outworld tools used - Photoshop

Processes used in outworld tools - I cleaned up the picture using liquify and some shading before I started to play around with texture options.


1.  The "sketch effect"...When the basic picture was to my liking, I went into the filter gallery.  Using Charcoal, I played with the sidebars to get the exact effect I liked.  Depending on your basic picture, my numbers were:  thickness 5, detail 5, balance 60.

2.  Border: This one is simple.  When you have achieved the look that you want, double click on the most recent layer (the one farthest up.)  This will take you into the Layer Style.  Here, I use inner glow.  I switch blend mode to NORMAL, 100% opacity.  I cange the color to black, you can use whatever color best suits your needs!  Choke to 100% and then play with the size to achieve the thickness that best suits your needs! 

I hope all that makes sense!!!    


Comments & Additional info
Read more

Lighthouse


Title of picture - Lighthouse

Photographer's Name - Peter Stindberg (peter.stindberg@googlemail.com)

Models Name - Nissa Nightfire


Poses Used - Custom Pose made by Peter Stindberg

Location used - Cataclysm (not really important for this photo, but can recommend the vistas in Cataclysm)


Windlight setting used - Default

Second Life Graphics Settings - Ultra, 2x antialiasing, anisotropic filtering on

Inworld photo tools used - None

Out of world tools used - Photoshop

Processes used in outworld tools - The photo consists of 5 seperate photographed layers. The clothing conists of two outfits that would eliminate each other layerwise, so that the two shots per outfit were necessary. Those 4 shots were then combined into the final outfit. Seperate layers of the final outfit  were enhanced with drop shadows to add depth to the photo. Hard edges, especially were prim clothing meets texture clothing, where smoothed with the various tools: traditional smoothing, cloning, repair brushes but also liquify. Jerky geometry triangles (for example around the breasts) were subtly smoothed using liquify as well. The background of the shot was seperated using a depth shot mask. The texture of the lighthouse (thus the name of the photo) looked too photorealistic, so I made it more cartoon-like. The last touch was a small dropshadow of the person on the lighthouse wall.

Comments & Additional info
I made a custom pose for this photo in QAvimator. The pose took 3 iterations before it worked as intended with the model. The selection of the outfit took Nissa a great deal of time. All in all this photo took 3 weeks from first idea to completion. Post-processing took a day. Flickr-Link:
http://www.flickr.com/photos/peterstindberg/4229540356/

Read more

Sunday, January 3, 2010

Into the Abyss


Title of picture - Into the Abyss

Photographer's Name - Arcadia Nightfire

Models Name - Arcadia Nightfire

Location used - theAbyss  (http://slurl.com/secondlife/The%20Abyss/78/141/237

Poses Used - Striking Poses - Girls With Guns 8

Windlight settings used - Default Windlight Setting, 8:10 p.m

Second Life Graphics Settings - High

Inworld photo tools used - PosePad Pro by Nyterave Studio, Facelight by Star FairyMeadow

outworld tools used -  Photoshop

Processes used in outworld tools -  I cropped the photo, adjusted the lighting levels, and added a small diffused glow to make the clouds appear brighter and thicker.  I also added a slight gaussian blur to soften the edges.  


Comments & Additional info
Read more

Wednesday, December 30, 2009

Even when the sky is falling down


Title of picture - "Even when the sky is falling down" 

Photographer's Name - Tess Falworth (tessfalworth@gmail.com)

Models Name - Tess Falworth

Location used - Taken at Rez

Windlight settings used - Coastal Sunset

Second Life Graphics Settings - High

Inworld photo tools used - Just a facelight

Details of inworld tools - NA

outworld tools used - Photoshop CS3

Processes used in outworld tools -

1) did my usual cropping to make the image tighter
2) took a copy and overlayed it on itself, using soft light setting in photoshop
3) desaturated the bottom layer a bit, enough to tone down the colors but still keep some
4) used the blur tool to smooth out rough edges
5) added the butterflies from  Deviant Art, from Unholy Stock, sort of my signature butterflies now, I've used them over and over..I like them becuase they are individual and their background is transparent, so I can crop them use them singly anywhere I want.
6) overlayed a texture by Max F. Williams from Flickr, using soft light setting in photoshop. This is my absolute FAVE texture. I thik 90% of my textured pics have this texture in one form or another.


Comments & Additional info


The thing about pics in SL.. it all starts with a good capture. After that what you do to enhance it just makes it all the more lovely. :)
 
Shape : my own..*smiles*
Skin: League
Eyes: Redgrave, Neverforget in Cyan
Hair: Zero Style
Tattoo: Garden of Ku
Bracers, collar, and boots: CatNip
Ears and Tail: K&L
Top: Immerschoen
Jeans: WoW
 
My own two cents: Redgrave eyes photograph amazingly well, as do their skins. But, lately, I've been partial to Curio and League. Zero Style hair is incredibly realistic in pics and has amazing flowiness :)  While I didn't  before, now when I shop for clothes, hair, skins, etc, I ask ":will this look good in a pic?" if so then I get it.. if not, then.. no. Generally speaking, the better the textures and the more detailed, the better it will look in an SL pic. Just my own opinion *grins*
Read more